Home Decor

Lifestyle & Fashion

Classroom Blog

Showing posts with label themes and holidays. Show all posts

Thanksgiving Addition Turkey Freebie


We love a good math craft and opportunity to show our mathematical thinking!! We have been exploring part, part whole addition strategies and connecting it to what we know about turn around facts and the relationship between addition and subtraction.

The turkey craft used above is from Jen over at First and Kinder Blue Skies. I absolutely LOVE all her themed crafts and have adapted them in many ways to find my curriculum needs. You can find everything you need from the craft here. 

Be sure to grab a copy of the addition freebie below!


After my mini-lesson, students create their own numbers for their part, part, whole addition turkeys. This is the perfect way to differentiate for each learner. I typically give my leveled groups specific number ranges to choose from (i.e. addition through 10, 20 and 100). This activity also gives students the opportunity to show their thinking more than one way. My rule of thumb is always to use pictures, numbers and words! The part, part whole digram is the "math picture," the turn around facts are the "number" and of course the explanation is the "words." Students in the addition to 10-20 range used the feathers to model the two "parts."


It's incredible to see just how much they're grown in being able to show their thinking and represent numbers with math models!!

You can find the Turkey Addition recording activity here!


I also got this adorable turkey hand activity idea from Sarah over at First Grader At Last. This is such an oldie but a goodie! We had such great fun skip counting by tens, fives and twos to answer the questions. It was even a great mental math lesson on place value for the students who were able to understand and explain that strategy!

Happy Turkey season everyone!

0

Memorial Day and The American Flag


Memorial Day is sneaking up on us here, despite how inconsistent our warm weather has been! I'd thought I'd hop on here and share some of the ways we celebrate our country and remember those who have served!

This post contains affiliate links for your shopping convenience.

Wearing red, white and blue might be one of my favorite ways to show honor and pride! I love how passionate my students are on our school themed days. Students come to school decked out in red, white and blue the Friday before Memorial day. For morning work, students come in and make a patriotic headband- which is perfect if any students forgot their red, white and blue! 

I snagged this cutie from Maria over at KinderCraze. You can click here to get a free template! 


After reading the easy-reader I created below about Memorial Day, I'll give the students a choice of a shared writing activity. The writing prompts are ...

"Tell me about your family's Memorial Day traditions..."
"How do you show honor and pride for our country?"
"Who is your hero and why?"


Students can add color to the illustrations after choral reading it together. You can get a copy of the writing paper, word search and easy reader for free here from my shop on TPT. 

One of the *best* books and my all time favorite when talking about the job of those who serve/d in the armed forces is "Brave, Like Me" by Barbara Kerley. It sparks engaging discussions and captures their attention. The real images of children and their families demonstrate their raw emotions. Bravery is the best theme to focus on when thinking and talking about those who lost our lives protecting our country. This book does it beautifully!!! 

You can find a copy of it here


In the spirt of all things red, white and blue, I also wanted to share a few ideas for you when exploring and learning about the American flag. Many of you might not be in school for Flag Day (many of my New Jersey friends are sure to be ha! ) however, you might take Memorial Day as an opportunity to do some American flag math!


After exploring the numbers and patterns and their link to history that make our flag, we spend time using rulers to draw the flag. After, we'll watercolor paint them and use tracing markers to outline each detail. 


May all those who passed protecting our country rest in peace and a big thank you to those who have fought or are currently fighting to keep our country safe! 
0

Hip, Hip, Hooray! It's the 100th Day!


It's that time of year again! It's the 100th Day and it's time to celebrate in style. As if the day couldn't get any crazier, our 100th Day fell on Valentine's Day last year. Lucky for me, it seems it's about to happen again this year too (assuming we have no snow days of course). I was thankful that I had an intern and some parent volunteers help prep materials, which made for a smooth day! 

I'm hoping to share some of the fun activities and ideas I found online that make for the perfect fun filled 100th Day. This post contains affiliate links for your shopping convenience. 


So much of the decor and set up of this day was inspired by my good friend Maria over at Kindercraze. I'm always in awe of how creatively she incorporates color into everything she does! It truly adds a magical touch. She is the genius behind the bold and bright lettering on the banners and backdrops. 

I used a large craft roll of paper and some paint dotters to letter a backdrop to our fashion show (more details below). The smaller paper was used as banner when entering our door. I even added colorful solid and printed streamers to hang from the banner. This is the perfect way to excite and engage students as they eagerly walk into the classroom that day.


One of the most exciting parts of the day is when students get to showcase their 100th Day t-shirt during the fashion show. I play music through YouTube- usually a Kids Bop mix so that it's something the kids can sing along to.


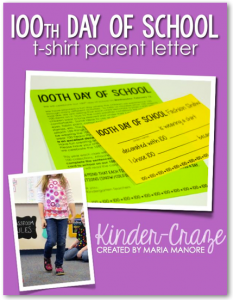
 Maria shared her 100th Day t-shirt parent letter for FREE over on her blog. 
Click here to grab yourself a copy!


I love the way she added 100s to the runway so I decided to do the same!


Here are some of the t-shirts from some of the students in my class last year. I love how unique of my student's designer were- their personality and interests truly shine through! I look forward to seeing the designs this year too- I'm thinking of switching mine up this year! I've been Pinteresting but haven't quite found the right one!


In addition to our fashion show, students rotate freely through various counting centers. Each center is a different way we count to 100. Many of the centers are freebies Cara Carroll has so graciously shared with her readers. You can find them and all her festivities here!

THE CENTERS I DO:

1. Roll and Race to 100 using a hundreds grid
2. Using the digits 1-0-0 to create a picture
3. Dollar Exchange- how many ways can you make $1.00
4. 100 Days Smarter- write 4 things you learned on the "100 Days Smarter" anchor chart
5. Read 100 books - students read books in the library and tally how many they read through out the day
6. 100th Day Hat- Ten strips of 10 stickers
7. Tally Ties- 100 tallies on a tie
8. Fruit Loop Necklace- string 100 fruit loops on a piece of yarn


Students don't *have* to complete all the centers. In the past I found that it's better to have more and keep them engaged, than having too much down time. They love having the choice of what to do and when to do it.

I ask for parent volunteers to come in and help manage the stations. Just a tip, the hat and fruit loop necklace station take the longest and could use a few extra volunteers to help speed things up! :) 


Hope everyone has a great 100th Day!
0

November Read Alouds


Turkeys have finally made an appearance in our classroom and I am excited to stretch them for all they're worth! ;) Thanksgiving holds a special place in my heart. It's the holiday that is celebrated at my house every year. Traditions are everything in my family and it seems that as a teacher, I have a few special traditions in my classroom too- some of the Thanksgiving read alouds are just to name a few!

There are great discussions to be had around the idea of giving and taking the extra time to think about all the we are thankful for. I find picture books are a great way to spark meaningful discussions around these topics... and of course to throw in a little fiction fun into the mix! I am excited to share with you some of my classroom Thanksgiving favorites and how we will be using them in the classroom during our shared reading/writing block.


I have included affiliate links to these books for your shopping convenience.

The Thankful Book by Todd Parr and Thanks for Thanksgiving by Julie Markes are perfect for your classic "I am thankful for..." activities. Each year after a few meaningful discussions on the spirit of the holiday, we list what we are most thankful for. This year I found an "I am Thankful" wreath at Target. I plan to use these read alouds as the inspiration for our responses for what we are thankful for.

  
Our reader's workshop unit in November focuses heavily on story elements, which works perfectly for Thanksgiving shared reading and writing activities. Last year my class absolutely fell in love with The Littlest Pilgrim. We read it for shared reading and worked together to identify and write the title, setting, characters, beginning, middle and end. My friends took the information on the shared anchor chart to put it in their own words in this pilgrim flip book craftivity. Can you even handle the cuteness with those little pilgrim heads?! I know I can't... freckles and all! And we think they aren't listening or noticing the small details...


While I whole heartedly believe in the power of writer's workshop, I often find a few rare instances in the year to do some creative writing! Thinking out of the box and writing something silly can often be a tough skill for our littles. I think this is the perfect way to engage writers and get them comfortable taking a chance with their creativity!

After reading The Great Thanksgiving Escape and Turkey Trouble, we wrote shared class books about what happened if the turkey escaped on Thanksgiving and what our turkey disguised themselves as. We came up with good "hooks." "I opened the oven and...." or "We sat down to eat dinner when....." Students had to fill in the sentence stem and add all their story elements. Which perfectly ties into our reader's curriculum. Run, Turkey Run! would also be a good fit for this lesson and is the perfect opportunity to tie in some procedural writing (I.e. How to catch a Turkey or How to escape a Thanksgiving Dinner)


A Plump and Perky Turkey and A Very Stuffed Turkey are perfect for teaching into adjectives. We will make our very own turkeys and list adjectives to come up with a turkey name. I am anticipating some of my kiddos will need a stretch, in which I will teach into alliteration and rhyme. I also built this anchor chart and ask students to turn and talk about different "adjectives" they heard in the stories. I added their responses to the chart on post it notes.


I have noticed my kiddos could use some help with identifying and remembering to capitalize proper nouns. I have seen "Proper Pete" anchor charts buzzing around Pinterest which is absolutely genius! Kudos to whoever came up with that genius idea! My kiddos absolutely adore Pete the Cat and I will use Pete the Cat's The First Thanksgiving to build a "Proper Pete" anchor chart to list examples of proper nouns.


Our science curriclum focuses on air and weather. We have been making all kinds of air and weather tools to explore it's properties and what we are noticing. One of mine and the kiddo's favorites is balloon rockets! In full disclosure, I have a super competitive side... it often comes out during this activity. The Great Turkey Race inspired me to have some turkey balloon races of our own. Last year, the kiddos worked in their tables to decorate and name their team turkey. Then we took turns racing each table's turkey. We made predictions on whether we thought if there was more air in the balloon, would it travel any faster? This was the perfect day before Thanksgiving break event. It's the perfect hands on STEM integration.

If you're wondering what a turkey balloon rocket is... it's teacher language for you take two strings, each with a straw on them and attach them to chairs. Then you take a balloon, blow it up, tape it to the straw and add any turkey decoration. Have the kiddos hold the air in the balloon until the class counts down and you let go! Its AWESOME!!!


In addition to this STEM integration, we used this text to complete this adorable craftivity from Cara Caroll over at The First Grade Parade. You can find her freebie here! Before the students completed this independently, we completed the anchor chart below as a shared literacy actIvity!


Another great read aloud for a STEM opportunity is Balloons Over Broadway. It's the true story of the puppeteer of the Macy's Thanksgiving Day Parade. Since we are located so close to New York City, watching or attending this parade is a tradition for many families. It's incredible for our students to think about the math and science behind this yearly event!


I am always looking for new ideas to add to the ever growing collection. This year I am excited to do this darling craftivity I found over at First Grade WOW . Nancy had the amazing idea of reading 'Twas the Night Before Thanksgiving with her kiddos and doing a little reader's response. "Save the Turkeys! Eat more..." I am hoping to teach into some persuasive writing with this little number. And of course the stuffed turkey character to go along with it seals the deal. The picture below is featured on Nancy's post.


Follow my Instagram page Firstgrade_made for posts on anchor charts, complete craft displays and more through this wonderful turkey time! 

0

Starting off the Year with Student Portfolios


Last year I dreamed of completing a special project to surprise my students and their families at the end of the year. I had found the idea and inspiration for a Student Portfolio from the sweet Cara Carroll over at The First Grade Parade.

The primary grades are filled with immense amount of growth and special memories that you want your students and families to always remember and cherish. Student portfolios are the perfect way to capture all of that and more for your students!

I had posted some pictures of the completed portfolios at the end of last year and had received some questions regarding how I put them together. In attempt to answer those questions, I wanted to share with you the year long process in time for you to start the year off with them!


To get you started, you'll need a class set of three ring binders (I use 1 inch but you can adjust to fit your needs), manilla folders and Avery 5160 labels.  I am lucky enough that my student supply list includes binders. Therefore, the students already have them and do not need to purchase them.

The manilla folders are used to house the student's complete products all year long. Each student gets one folder. Once the student's work comes down after being hung up, it goes into their manilla folder, rather than home in their homework folder.

If you begin to notice in the picture, I attempt to keep at least one thematic piece from each month/holiday season. This can include writing responses, crafts, lists, etc. It's up to you to customize what you would or would not like to include.

I also keep a writing portfolio specifically for their writer's workshop pieces. Both portfolios measure and show an immense amount of growth.


If you choose to keep the student pieces in a manilla folder, it will help to keep the items in chronological order. This will make it much easier when assembling them at the end of the year.

I didn't put them into the binder until the very end of the year. I used a hand held hole puncher  due to the fact that most of the student pieces were larger than a 3 hole puncher.


Something I will consider and try to do more is use student name labels on each child's completed work. Often times due to the limited time constraints in our schedule, we only have a minimal amount of time to complete these types of activities. Therefore, we finish and clean up in a hurry which means sometimes our names don't always end up on our completed work.

The times I used Avery 5160 student name labels, it was not only easier in managing the student work, students felt proud when they saw their work clearly labeled and identified.


I will admit that I had help when assembling these. It didn't take as long as you would think! No matter how long it takes, I assure you that it's worth it!

Both the parents and students loved them equally! I can only image myself as a parent and how special of a gift that would be for me to receive at the end of year. It's priceless! :)


If you're thinking of doing student portfolios, you can find the Student Portfolio cover I used here. It is a document that will allow you to add text as you need. (Student name, year, teacher, school, etc.)


Be sure to let me know if you have any other questions that I missed!!
1

Search This Blog